66.5 ETX-G Graphics Editor
The ETX-G Graphics Editor allows you to create and edit graphics objects and scene projects in Etere ETX-G.
You can launch the application by selecting the Etere Graphics Editor shortcut from the Windows Start menu or by double-clicking the shortcut on the Windows desktop.
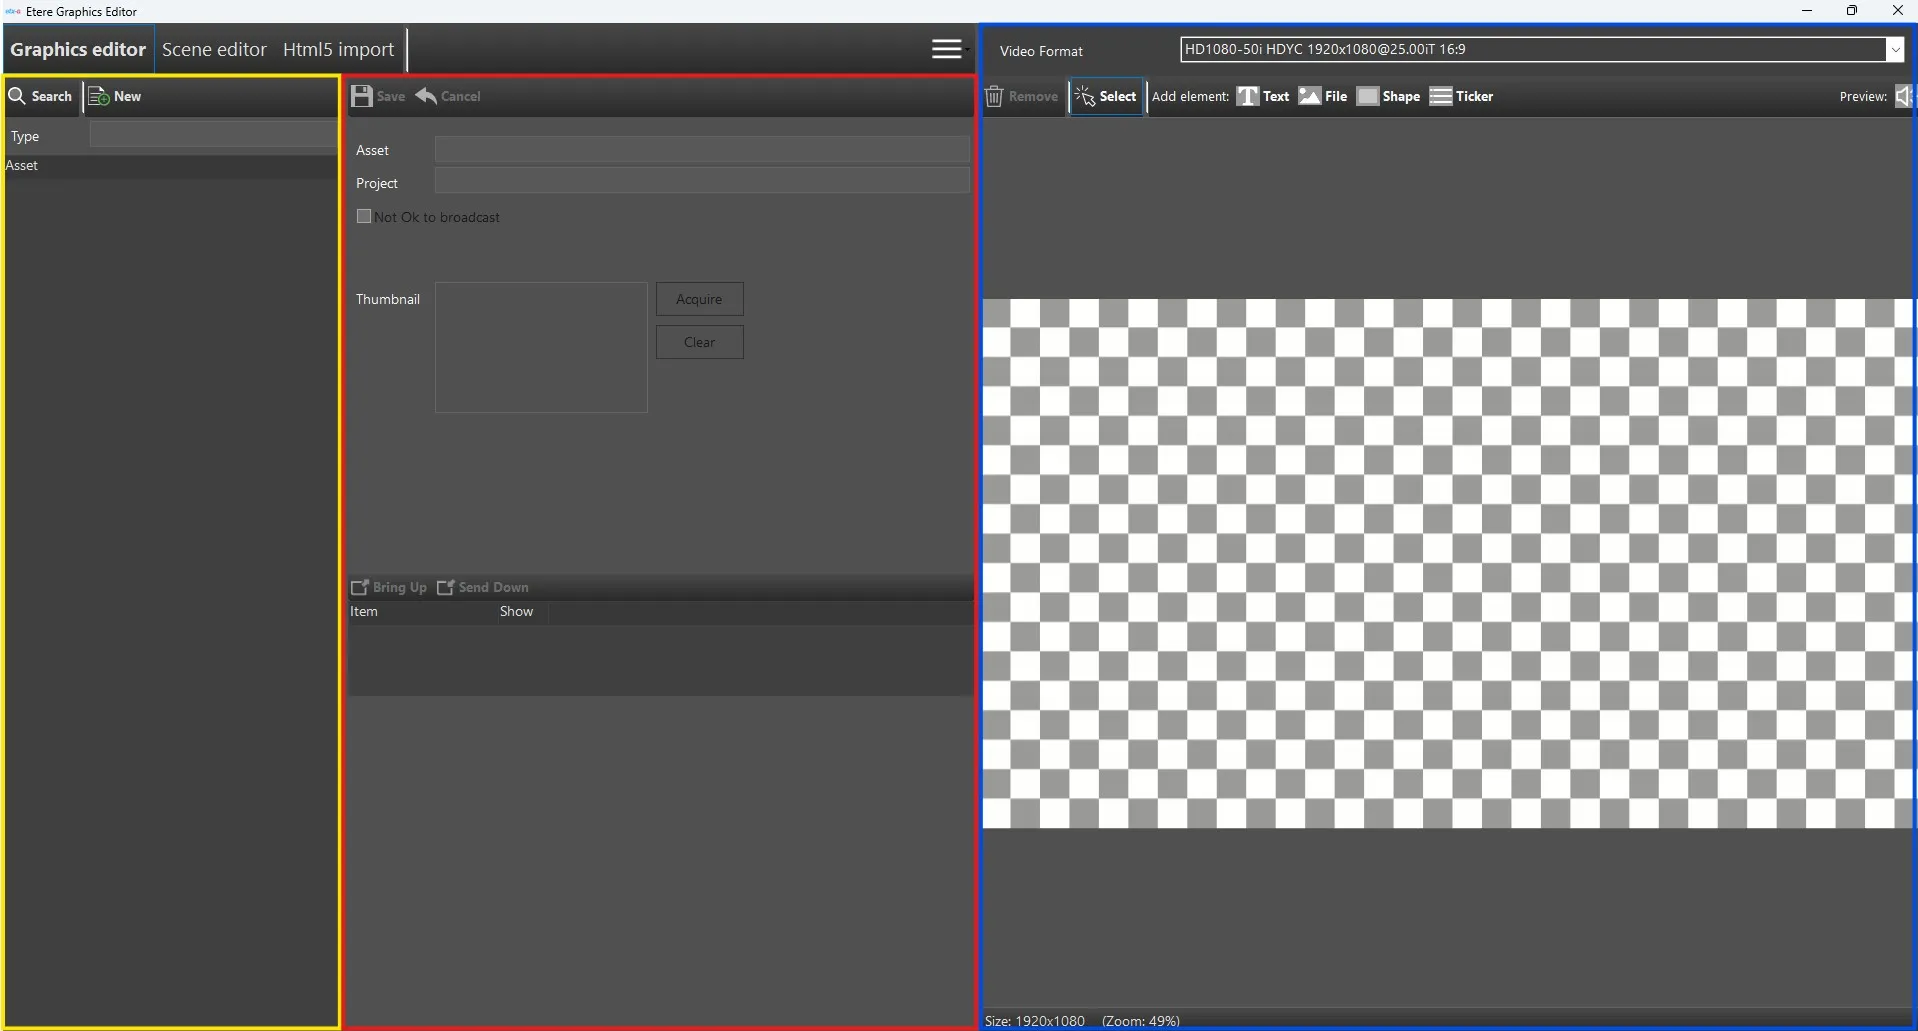
The editor is divided into three main sections:
Left panel (yellow box in the image): Contains the search panel, which lists all existing projects and includes the Search (full-text search) and Type filters. A new project can be created using the New button.
Center panel (red box in the image): Displays the project details and all the available options for the currently selected element.
Right panel (blue box in the image): Contains the preview area, where elements can be positioned on the canvas. The preview reflects the aspect ratio selected in the Video Format drop-down menu.
Etx-g_graphics_scene_editor
Create a new ETX GRAPHIC
Click the New button to create a new ETX Graphic. The application prompts for a name, which becomes the code of the asset (type ETXG). After clicking OK, the asset is created and the corresponding project is automatically loaded.
From the right panel, you can select the elements to add to the preview area and position or resize them as required.
The following examples illustrate this process:
- Add element: FILE
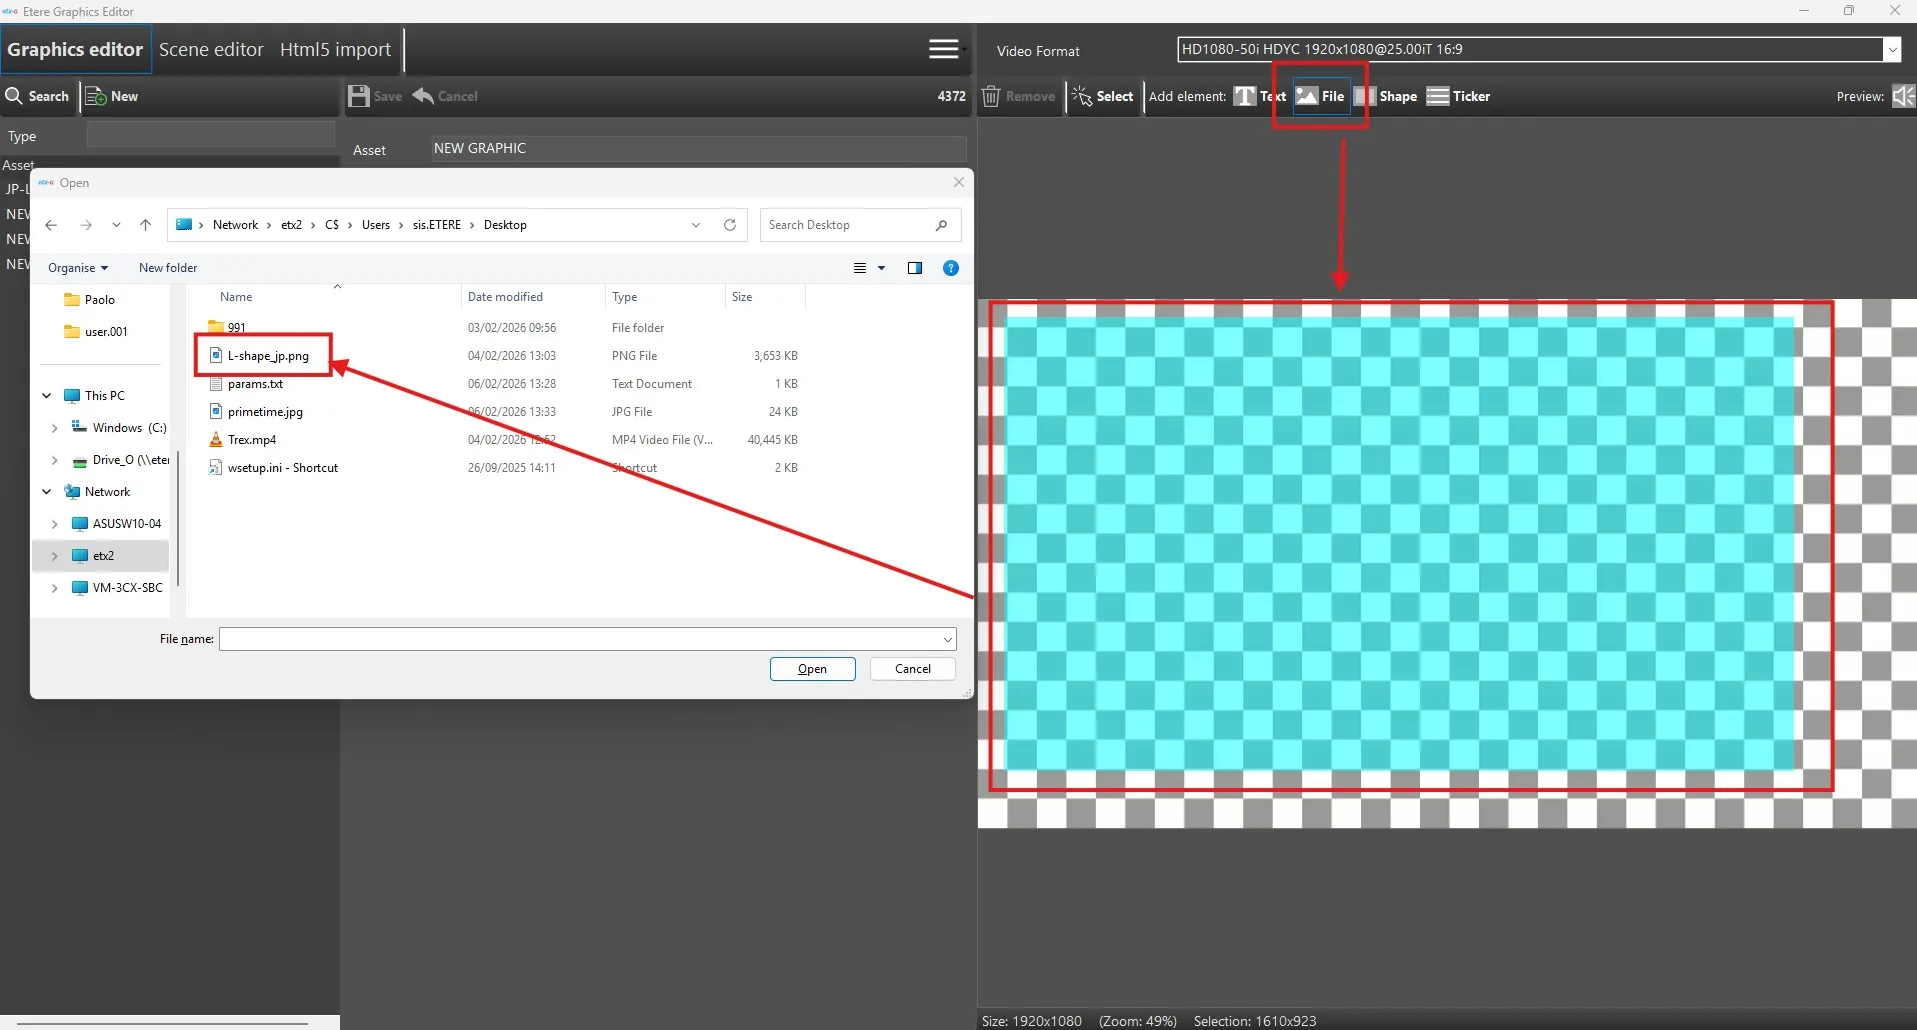
Select File from the list in the right panel, define the area where the graphic will be displayed, and browse for the file stored on a local or network folder.
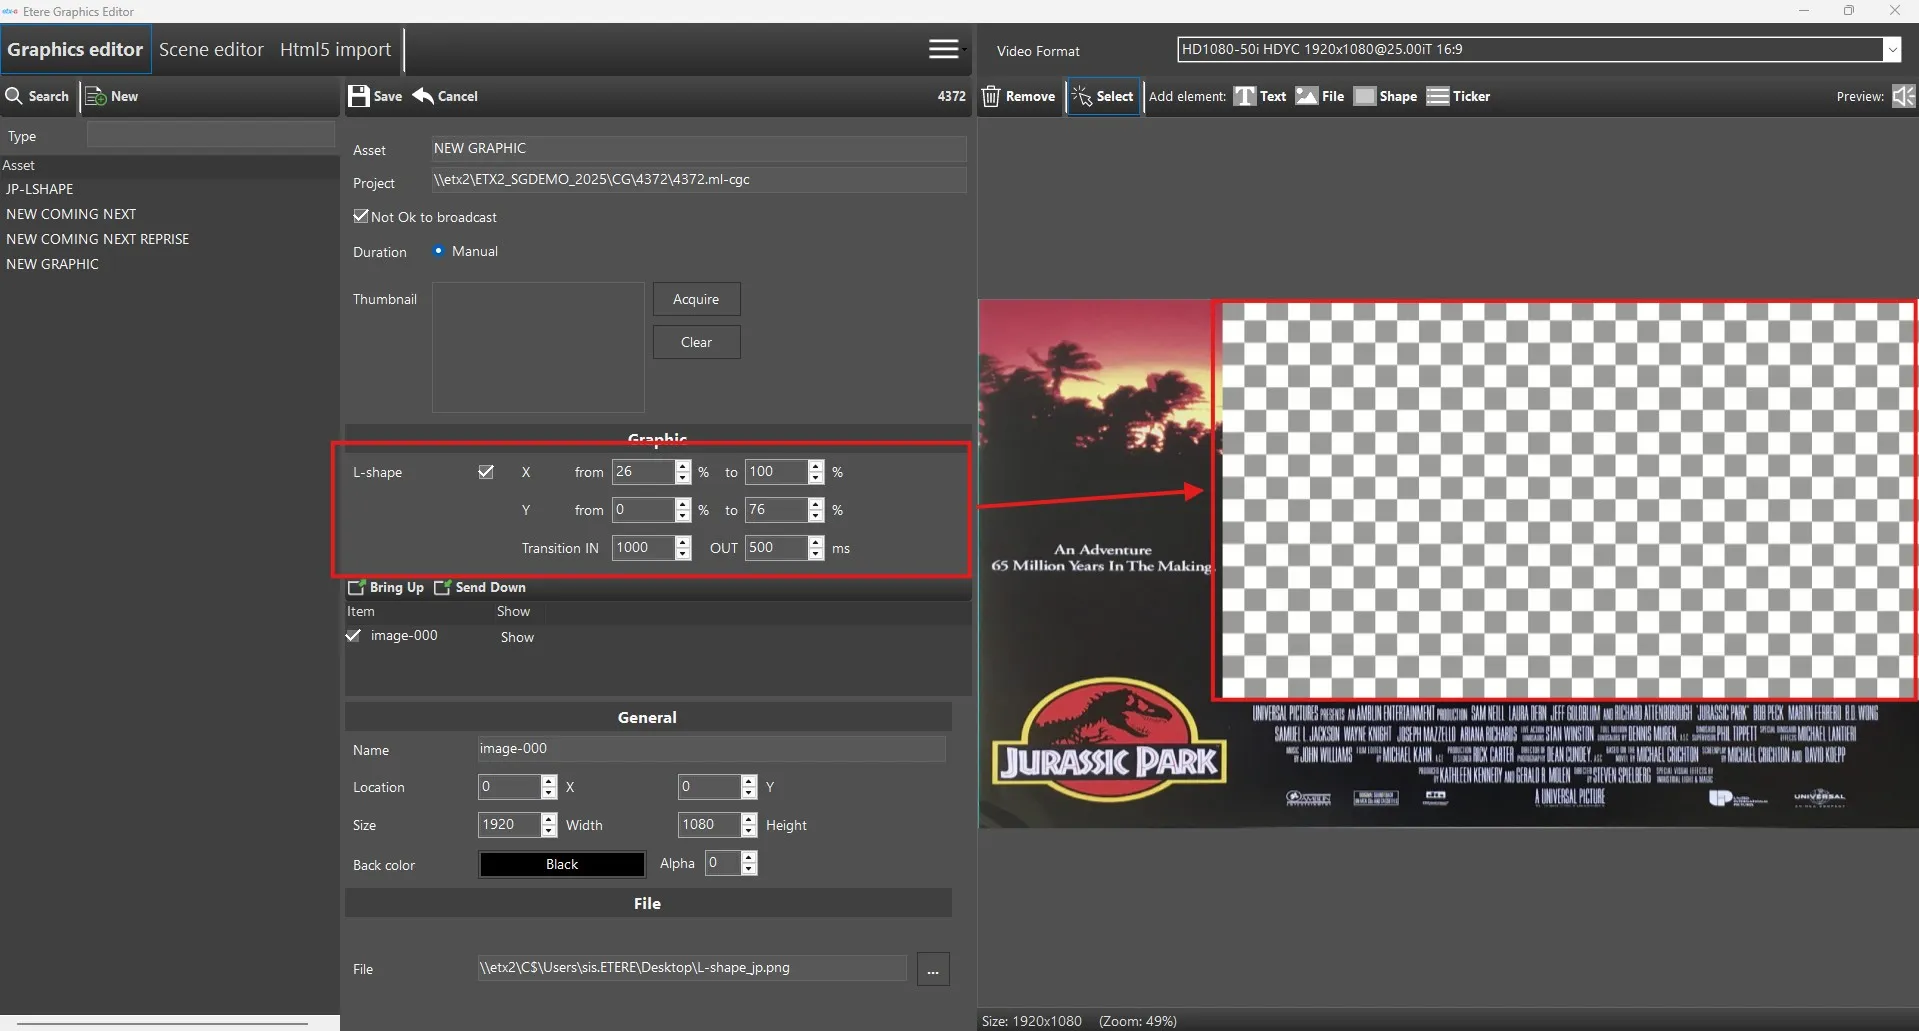
The central panel allows you to specify the exact position and size of the graphic. For L-shaped graphics, you can also define the exact dimensions of the screen area where the video will be squeezed, as well as the transition durations for the in and out effects (in milliseconds).
Load_file
Load_file2
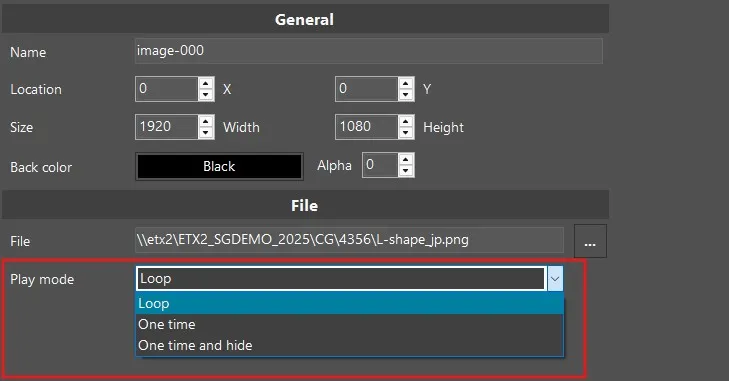
It is also possible, for any kind of FILE element, to set a specific Play Mode from the available ones on the list.
Loop: loop mode
One time: play item one time and keep the last frame on video
One time and hide: play item one time and automatically hide it from video
PlayMode - Add element: TICKER
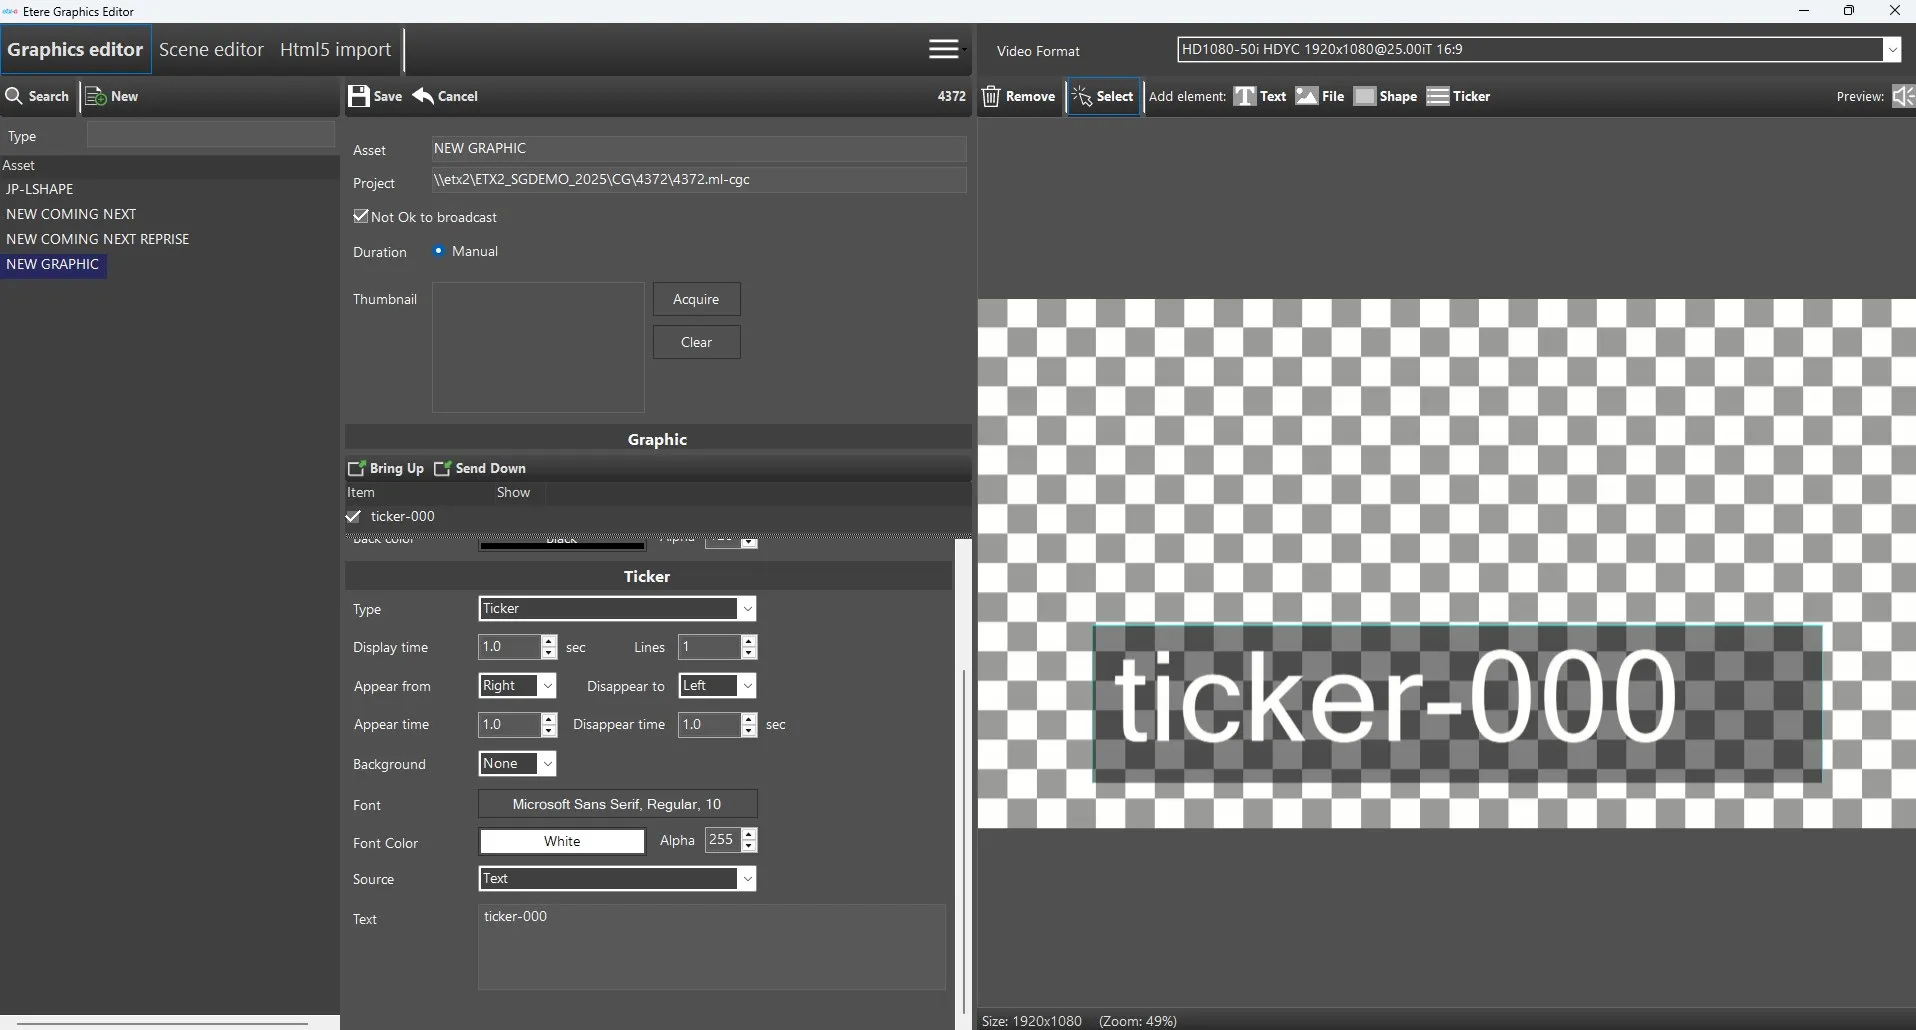
Select Ticker from the list in the right panel and define its position and size in the preview area.
The central panel allows you to configure the ticker's general properties, including its dimensions, position, background color, and alpha gradient.
You can also configure text-specific settings, such as the display duration, number of lines, fade-in and fade-out durations, and font. The ticker text can either be entered manually or loaded from a .txt file.
Ticker
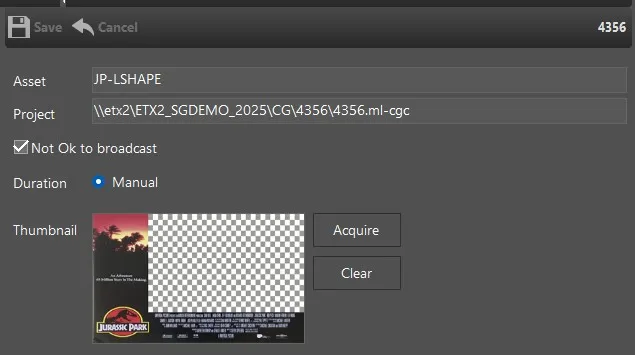
It is possible to associate a thumbnail to the asset by using the "Acquire" button. To remove the thumbnail, just press the "Clear" button.
The graphic can be saved at any stage of the creation process while keeping the "Not OK to broadcast" option enabled. Once the project is complete, the flag can be manually cleared.
Thumbnail_and_save
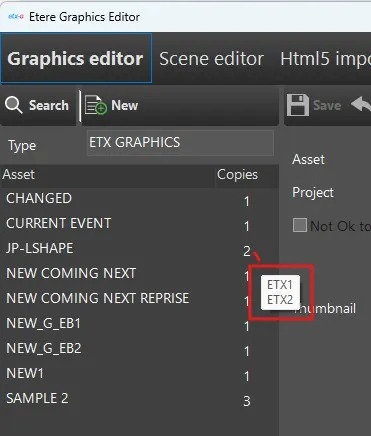
If a graphic has already been restored to the Playout storages, the number displayed next to the graphic name indicates how many copies have already been created. Hovering the mouse over the number displays a tooltip listing all the associated CLOUD-DEVICEs. In this case, whenever the original graphic stored in the default graphic storage is edited, the changes are automatically applied to all existing copies.
Copies
 Etere_graphics_editor
 load_file
 load_file2
 PlayMode
 ticker
 thumbnail_and_save
 Copies